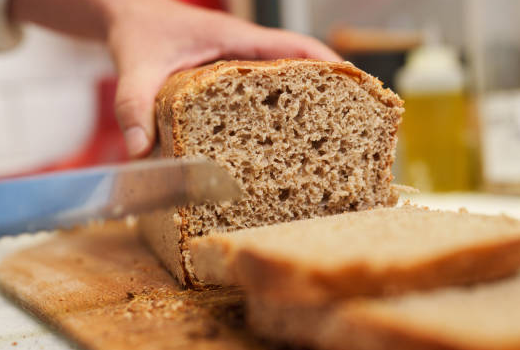
How to Bake Your Best Bread Using a Bread Machine

FROOT Thief Real Fruit Whips: A Delicious and Wholesome Treat for Fruit Lovers
March 28, 2025
Sensible Portions Garden Veggie Straws – Snack Smarter!
April 7, 2025There’s nothing quite like the comforting aroma of freshly baked bread filling your home. And while the whole process of kneading dough can be quite therapeutic, what if you don’t have time for all those steps? Or perhaps you’ve been struggling to get your French bread to rise properly with yeast. Wherever you are on your bread-making journey, knowing how to use a bread maker is different from simply following a regular bread recipe (though you can adapt your favorite recipes to fit your machine!). We’ve gathered some helpful information on mastering your bread maker, along with some beginner-friendly tips.
Baking Bread with Your Bread Maker
First and foremost, you need to get to know your bread maker. There are many different brands on the market, and the newest models have far more intricate settings than those from the ’80s. So, while the instruction manual might not be the most thrilling read, take the time to go through your user manual. This will familiarize you with all the operational procedures and settings. Here are some examples of settings you might see on popular bread makers:
- Basic: Use this general setting for most types of bread.
- French: For lighter loaves made with fine flour, resulting in a crispy crust.
- Gluten-Free: Since this is made with different flours, this setting helps achieve the best texture.
- Dough: Choose this option if you plan to shape, proof, and bake your bread (like pizza or cinnamon rolls) in a conventional oven. It will mix and knead the dough, often allowing it to rise once before finishing the entire baking process.
- Express: In a hurry? Surprisingly, many models can have bread ready in just one hour, from start to finish.
- Timed Bake or Delay Bake: This setting allows you to load ingredients into the bread maker but bake later. Since the ingredients will sit in the machine for a while, avoid this setting for recipes requiring fresh milk, eggs, cheese, and other perishable ingredients.
Choosing Your Bread Size
Bread maker recipes will typically list ingredient amounts for 1.5-pound and 2-pound loaves. Check your user manual for your pan capacity to ensure you select the appropriate bread size.
- For a 1.5-pound loaf, the bread maker pan must have a capacity of 10 cups or more.
- For a 2-pound loaf, the bread maker pan must have a capacity of 12 cups or more.
Adding Ingredients to Your Bread Maker
Manufacturers typically recommend adding liquids first, then dry ingredients, and finally the yeast. This keeps the yeast away from the liquid ingredients until kneading begins. Even if your recipe shows a different order of addition, follow your manufacturer’s instructions for adding ingredients. Select the program or setting listed in your recipe, or follow your manufacturer’s instructions.
Checking Your Dough
After about 10 minutes of kneading, check the consistency of the dough (it’s perfectly fine to open the lid). Dough with the correct amount of flour and liquid will form a smooth ball.
- If the dough looks dry and crumbly or forms two or more balls, add extra liquid, 1 teaspoon at a time, until one smooth ball forms.
- If the dough is too wet to form a ball, add extra bread flour, 1 tablespoon at a time, until a ball forms.
Do you have a favorite bread recipe you’d like to try adapting for your bread maker?